MIDIbox BLM doesn't provide any intelligence to play sequences by itself, instead it only acts as a control surface enhancement for the host application such as MIDIbox SEQ V4. This means in other words, that all features are implemented at the host side.
Following BLM modes are supported by MBSEQ. You can switch between the modes by holding the SHIFT button while pressing an "extra column" button.
Grid mode: displays a 16 step view of the selected track. The usage depends on the parameter layer assignment:
Note Layer: each 16x16 row will play a different note. The 16 notes per column are pre-selected based on the current scale (MENU+FX->Scale) to increase the octave range, and to simplify the entry of harmonic notes. Important: one note per step can be selected if the track only contains a single note layer (default). By adding more note layers in the MENU+Event page it's possible to select multiple notes per step for polyphonic sequences.
Any other parameter layer such as velocity/length/CC/PitchBender/Roll/Probability/etc.: each 16x16 column works like a VU meter.
Drum Tracks: each 16x16 row is assigned to a different note (drum instrument) as configured in the MENU+Event page. Hint: instead of drums you could also play a synth. Since each note can be predefined, you are able to create your own "scale" this way.
Extra Column: selects the track that should be edited. Push the button twice to mute/unmute a track.
Extra Row: selects the step view. Increase the track length to play more step views. Use loop mode or the section function to play only a single step view.
ALT+Extra Row: selects the octave
Planned future enhancements: pressing SHIFT+16x16 button should set accent, pressing SHIFT+extra row button should select the section that should be played
Track mode: displays a 16 step view of all tracks.
16x16 buttons: set/clear a trigger.
Extra Column: selects a track. Push the button twice to mute/unmute a track.
Extra Row: selects the step view. Increase the track length to play more step views. Use loop mode or the section function to play only a single step view.
ALT+Extra Row: selects the trigger layer
Planned future enhancements: pressing SHIFT+16x16 button should set accent, pressing SHIFT+extra row button should select the section that should be played
Pattern mode: displays the patterns of all 4 groups.
16x16 buttons: each quarter directly selects the pattern of a group (up to 64 patterns per group)
ALT+16x16 buttons: each quarter stores the pattern into the selected slot
16x16 LEDs: green: pattern is selected for next measure, red: pattern is played, yellow: pattern is selected and played
Extra Column: selects a track. Push the button twice to mute/unmute a track.
Extra Row: no function yet.
Planned future enhancements: pressing SHIFT+16x16 button should select the pattern synchronized to measure independent from the global "synch-to-measure" function.
The extra row could select a song phrase (so that all 4 groups change to predefined patterns)
Keyboard mode: allows to play notes of the selected track "live".
16x16 buttons: each 16x16 column will play a different note. Than higher the row, than higher the velocity of the played note. The 16 notes per column are pre-selected based on the current scale (MENU+FX->Scale) to increase the octave range, and to simplify the entry of harmonic notes.
Extra Column: selects a track. Push the button twice to mute/unmute a track.
Extra Row: sends a note to the transposer (starting from C-2, unscaled)
ALT+Extra Row: selects the octave
Planned future enhancements: pressing SHIFT+16x16 button should play&hold a note until the same column is selected again.
Support for playing notes on drum tracks.
303 mode:
first row selects accent
second row selects glide
third and fourth row select octave (4 different selections)
remaining rows select key of octave and set/clear gate
Stop: stops the sequencer
Start: starts/restarts the sequencer
Following extensions are planned for future releases:
Keyboard Recording mode: live recording function
Transposer mode: direct access to all 4 Transposer/Arpeggiator busses
Keyboard Split mode: play two instruments with upper/lower half of 16x16 matrix (with reduced velocity resolution)
Keyboard Track mode: all 16 tracks can be played "live" with only a single velocity value. Will be nice for quick soundchecks.
Loop mode: all 16 tracks are displayed like in "Track" mode. By pressing one button the last step can be defined (restart at first step once this step has been reached). By pressing two buttons the sequencer will loop between the steps.
Mixer mode: direct control of CCs and program changes like in the MENU+Mixer page
Hardware and Connection to MIDIbox SEQ
The MIDIbox BLM firmware is running on a MBHP_CORE module, and communicates with MIDIbox SEQ via MIDI. It's possible to add a third MIDI IN/OUT pair to the MBHP_CORE_STM32 resp. MBHP_CORE_LPC17 module so that the original two IO ports can still be used for other connections.
No special configuration has to be done in the MBSEQ_HW.V4 file. Please don't be confused about BLM_* and BLM8x8_* parameters. BLM_* parameters configure the (expired) 4x16 BLM which was provided by MBSEQ V3 but isn't so powerful as BLM16x16+X. BLM8x8_* parameters configure a special matrix for Wilba's Frontpanel to save some shift registers.
The only configuration which is required has to be done in the MIDI->Misc menu as shown in this picture:
Once selected, MIDIbox SEQ V4 will start an auto-detection at this MIDI port and configure the BLM16x16+X firmware remotely.
Sidenote: the term "BLM_SCALAR" is sometimes used instead of BLM16x16+X to highlight the scalability of the hardware concept - in future different BLM dimensions could be provided, MBSEQ V4 is prepared for detecting the size w/o the need for additional configurations.
Virtual BLM16x16+X
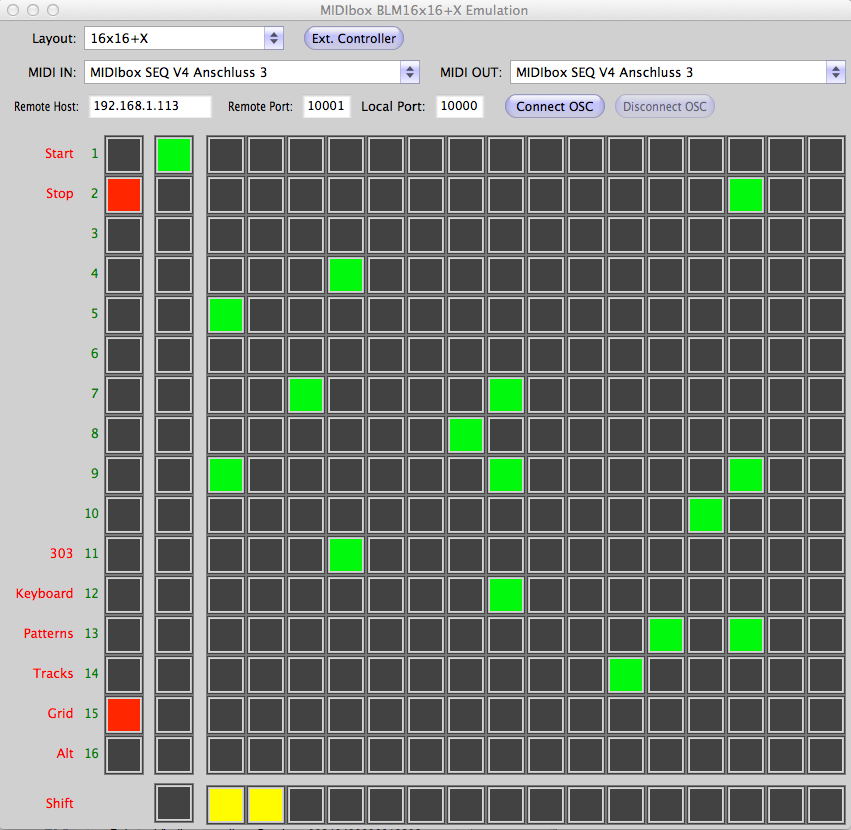
The virtual MIDIbox BLM16x16+X runs on a Windows PC or Mac and allows you to evaluate the new possibilities before building the hardware:
To establish the communication between MIDIbox SEQ and the BLM emulation, select an unused USB MIDI port (e.g. USB4) in the BLM application and in the MENU+MIDI menu of your MIDIbox SEQ V4:
Important: the BLM modes are normaly selected with the SHIFT button. Since it isn't possible to select two button functions with a mouse (if you don't own a touchscreen...), the SHIFT function can alternatively be activated with the space key of your computer keyboard. /Update: since v1.1 the shift button functions are selectable (and displayed) with a second extra column at the left side of the BLM.
MIDIbox_BLM_1_4 for Linux at 32bit
If you are running Linux in 64bit mode, you may have to install i386 libraries with: apt-get install libfreetype6-dev:i386 libasound2-dev:i386 libasound2-plugins:i386 libgl1-mesa-glx:i386 libgl1-mesa-dev:i386
Note: meanwhile the code base has been updated to 64bit systems --- if you notice problems with these older release, please let me know and I will make the binaries available
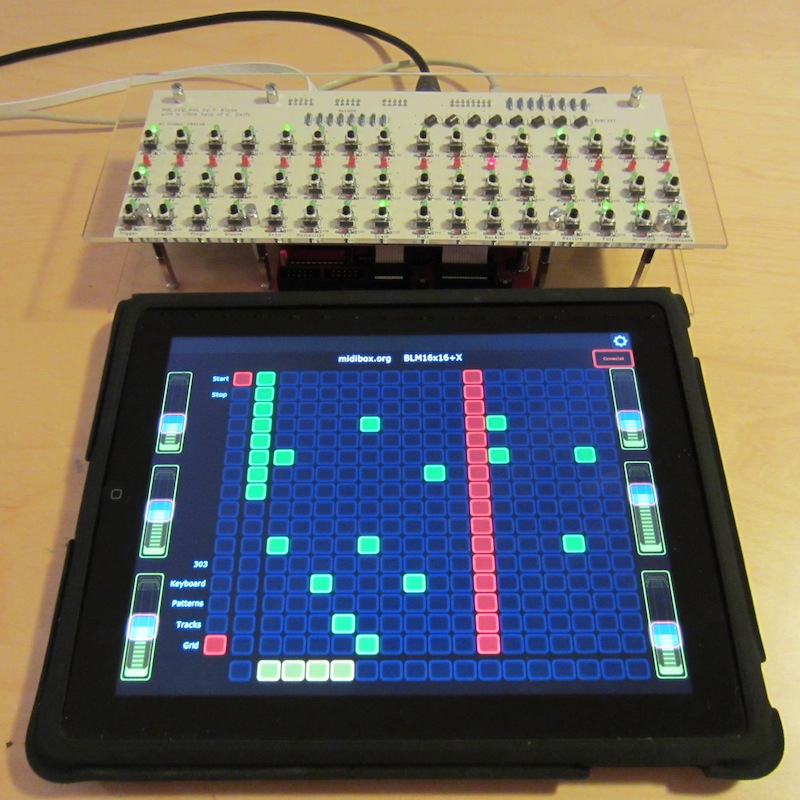
Lemur based BLM16x16+X for iPad
After I got my first experiences with Lemur for iPad I must say that this software is really a master piece!
In distance to TouchOSC the controllers are fully programmable with an easy to learn script language.
And in distance to OSC it's also possible to work with MIDI at low-level -> means: at bit basis (e.g. a MBSID Editor is feasible)!
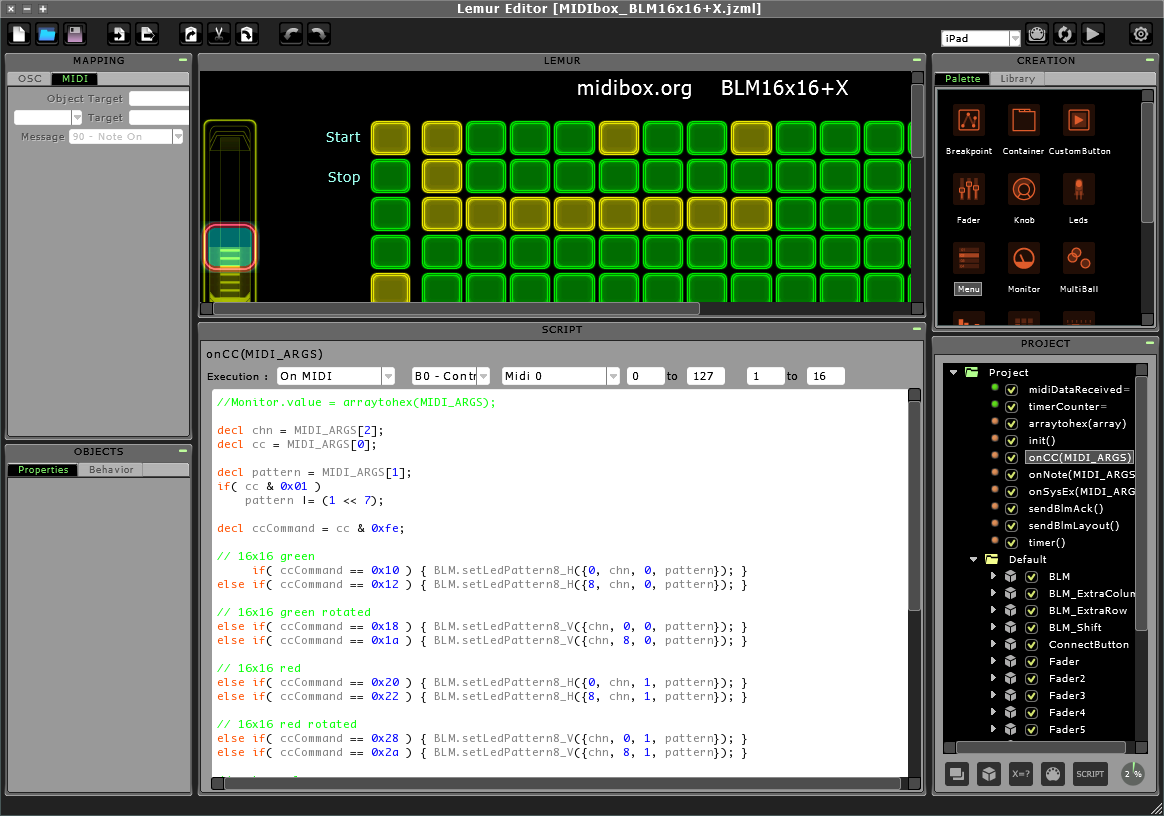
Within a couple of hours I was able to implement a complete BLM16x16+X emulation:
The user interface feels much better than the Juce implementation, and due to the easy to use Lemur Editor it's possible for everybody to customize the user interface!
So, if you own an iPad, and already bought Lemur, just install this template:
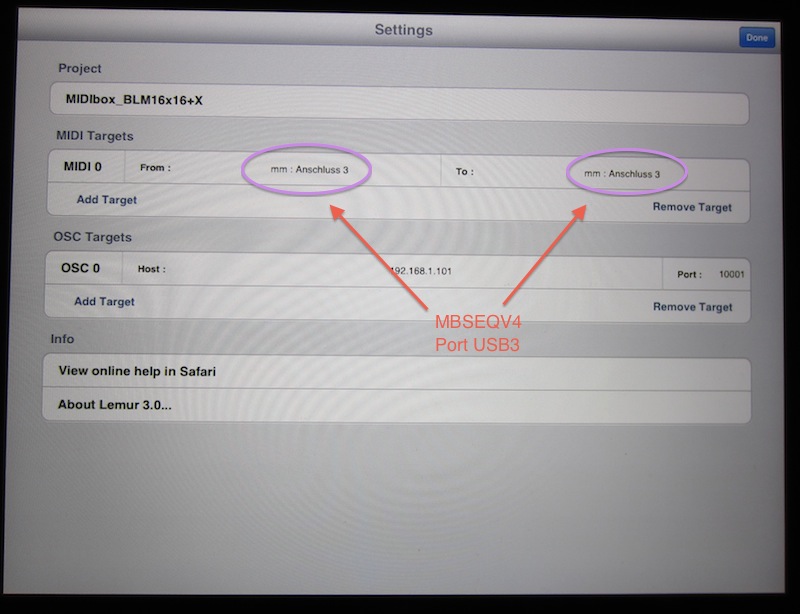
Thereafter start the Lemur Daemon for a MIDI;lt&-;gt&OSC connection, and on MBSEQV4 configure the BLM port (MIDI-;gt&Misc page)
E.g. to USB3 like I did...
This MIDI port can be select in Lemur as well:
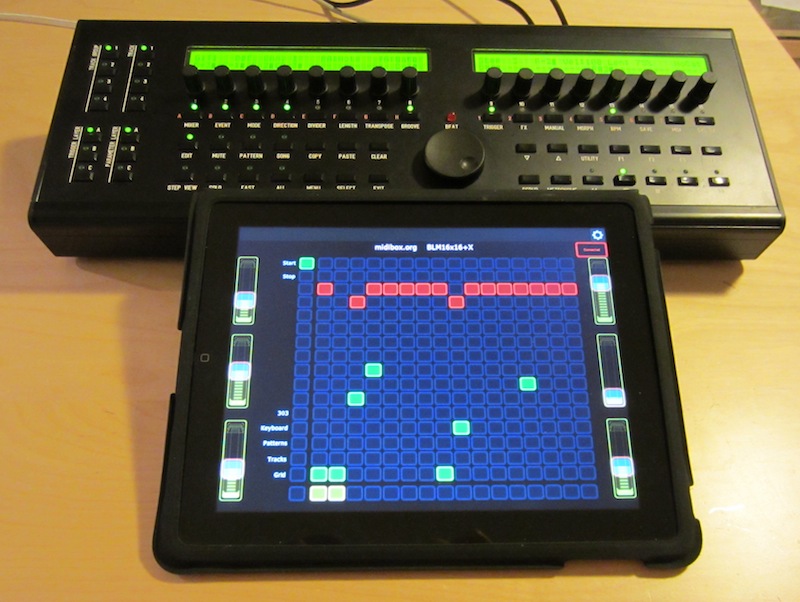
Now you are ready for having some Multitouch BLM fun!
Update: with MBSEQV4L V4.055 the BLM is also supported by MIDIbox SEQ Lite!
Sequences can be directly entered in Grid or 303 mode.
Patterns can be selected in a grid as well (like known from Ableton Live).
The keyboard mode allows to play a synth directly, but can also be used for recording!
Setup procedure (commands can be entered in MIOS Terminal):
(assumed that iPad IP address is 192.168.1.110):
set osc_remote 3 192.168.1.110
set osc_local_port 3 8000
set osc_remote_port 3 8000
set osc_mode 3 1
set blm_port OSC3
store
In Lemur, set the IP address of your MIDIbox with port 8000